How It Works: Piloted Unloader Valve
THE PILOTED UNLOADER VALVE
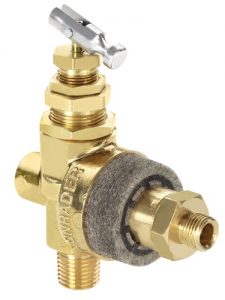
There are few components on an air compressor that can multi-task quite like the piloted unloader valve. This single component can activate an engine idle control, divert air from the tank when it reaches the top pressure setting and can reduce oil consumption by equalizing pressure between the pump and check valve. The following blog post will help you understand the piloted unloader valve by pointing out its components, explaining how it works and describing the adjustment process.
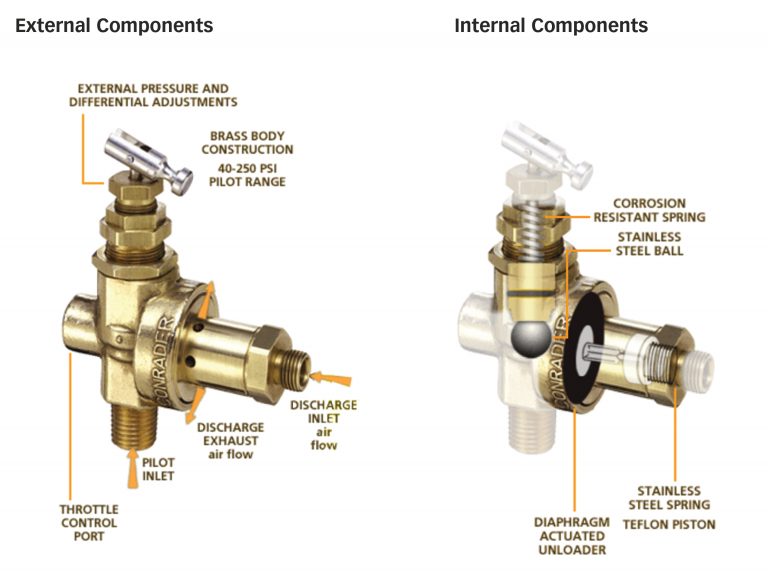
COMPONENTS
The diagram below shows the components of our most common piloted unloader valve, part number 131B.

HOW IT WORKS
Piloted unloader valves combine a pilot valve and an unloader valve to run an air compressor continuously. While this type of valve is most commonly used on gas-powered air compressors, it can also be used on electric models. While the air compressor is running, the pilot remains closed until the pressure reaches the unload setting. When that happens, the pilot opens and pressurizes the unloader valve, causing the unloader valve to open and excess air from the compressor to vent to atmosphere. As the compressed air is used and the pressure drops to the load setting, the pilot closes and depressurizes the unloader valve. The unloader valve then closes and the pressure begins to build again and repeats the cycle.
HOW TO ADJUST
For a visual guide on adjusting our piloted unloader valve, click here. Otherwise, read on.
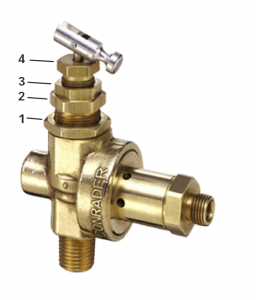
Resetting Differential
- Make sure the top toggle lever is in the down (horizontal) position.
- Loosen locknut (1) by turning counterclockwise several full turns.
- Gently turn differential setting (2) clockwise only until the internal rod makes contact with the steel ball inside.
- After making contact, turn differential (2) counterclockwise exactly 1/4 turn.
- Secure position by tightening locknut (1) and proceed to top end setting.
Top End Setting
- For the standard top-end setting of 135 PSI, adjust differential (4) so that 3 threads show above locknut (3).
- Loosen locknut (3) by turning counterclockwise several turns.
- Turning (4) clockwise to increase the top end pressure setting or counterclockwise to decrease.
- Begin at a low setting by turning counterclockwise one full turn. Proceed to fine tuning instructions.

Fine Tuning Instructions
- Start engine/motor and observe tank pressure gauge. As tank pressure approaches 135 PSI, the unloader valve should begin unloading at felt muffler and cause gas engine to slow down to idle speed.
- If pilot valve does not unload as tank pressure approaches 135 PSI, slowly turn top end setting (4) counterclockwise until pilot starts to unload prematurely (at 105 PSI).
- Turn top end setting (4) clockwise in 1/4 turn increments, tap down on internal rod at toggle and repeat until desired top end setting is reached.
- If pilot valve begins to rifle (sputter), fine tune differential setting (2) 1/16 turn in either direction until rifling stops.
- After fine tuning, secure setting by tightening locknuts (1 & 3) while holding settings (2 & 4).


